Warhammer 40k team tournaments involve 8 players matching up in individual games against the 8 players of the opposing team. This requires a mechanism to determine who will play against whom. Various mechanisms have been used such as dice or paper slips, but after seeing John Wick 4 (where metal plates are used to determine the rules for a duel) I thought the use of metal plates to decide the order of battle would be more awesome.
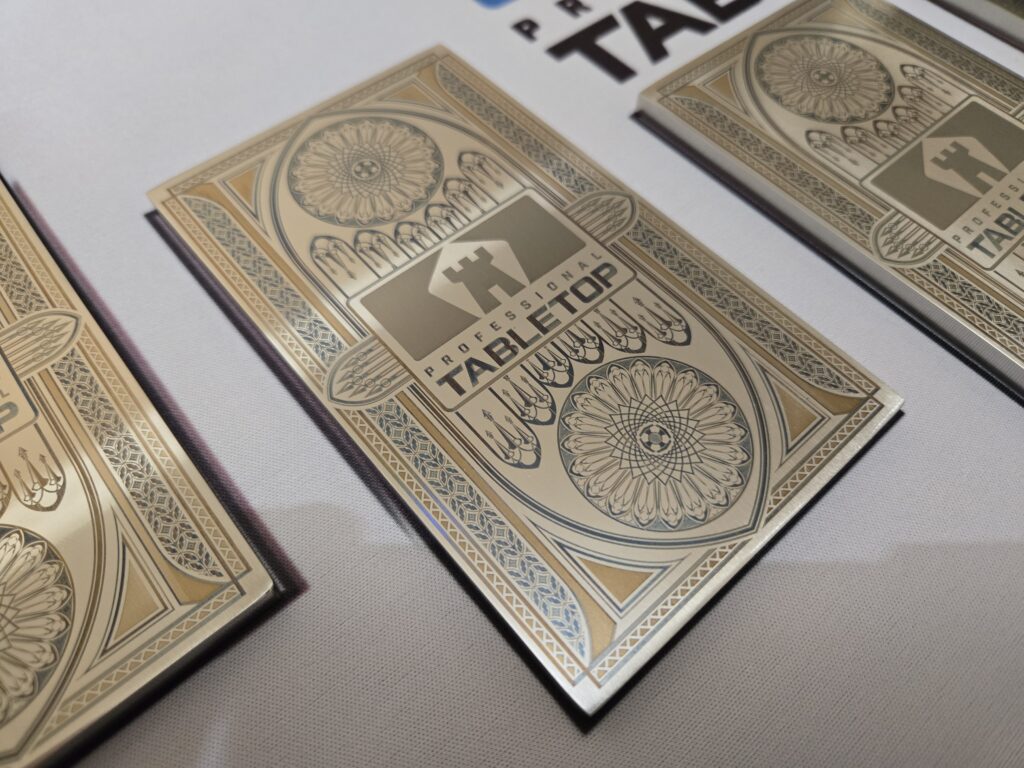
There are 8 plates in this set. All plates have the same front. Each plate has a faction and player name on the back.
The plates are 5″ tall, 3″ wide, 0.25″ thick and are composed of 304 stainless steel with each weighing almost 1 pound (around 450g).
No dye, ink, or paint is present on these plates. The decorations are achieved by using a pulse laser to selectively change the oxidation state of the contained chromium to generate the visible colors. Because of this the surface of the plates are smooth to the touch and the color can only be removed by something capable of removing the outer surface of steel from the plate. The color palate is rather limited since there are only a few states available, but copper, gold, black, and blue are available.
Other than the team and faction logos I designed the art for these myself. At first I was going to copy the plates used in John Wick but those are very art deco and the grimdark of 40k called for a more gothic aesthetic.
This laser technique is well documented but not often used since it is exceptionally sensitive and far slower than other processes. A difference of only 100mw in output power can completely change the resulting color. Additionally, any surface not within the exact focal plane of the laser, due to even the slightest imperfections in the surface, will ruin the color.
The overall process for these plates was:
Milling – The plates as delivered from the supplier are not flat and must be machined into condition. I did this with my Tormach 1100 and a fly cutter.
Grinding – Starting at 220 and then moving to 400 grit using my Ameribrade grinder, this process was the most miserable. Grinding the surface of a 3″ wide plate with a 2″ wide belt is not particularly pleasant.
Polishing – Using a buffing wheel and starting with a Maverick Abrasives black and finishing with green puts a mirror finish on the plates.
Laser – It took about 1.5 hours to process each plate. Since the lens I wanted to use for this operation only has a 4″ working area and I have a 5″ plate I need to split the operation into 2 steps for each side. This was factored into the design. Clustered finials in the middle of the design split the art into separate upper and lower sections. The included gap around the finials allows for some small error in alignment after repositioning the plates without making the error obvious.
Overall I think it turned out fairly well. If I could find a supplier for pre-polished 304 plate (not sheet, but plate at 0.25″) it would make this a much easier workflow.